WhatsApp has become one of the most widely used messaging apps in the world and one of its most popular tools is stickers. They make conversations more personalized and fun, but did you know that there is a way to make stickers on WhatsApp? It's possible to make them in a personalized way, whether for Android phones, iOS or even PC!
The app even offers several ready-made stickers, but creating stickers on WhatsApp has become a way of expressing creativity in a personalized way. It's also possible to add stickers on WhatsApp, so today we're going to give you a complete guide on how to do this, using WhatsApp itself or external apps that are free and simple. Let's find out how to make stickers on WhatsApp!
How to make WhatsApp stickers on Android
Making stickers on WhatsApp isn't a difficult or complex task, in fact, it's something that can be done very quickly and in just a few steps. If you have an Android phone, follow the instructions below and create your own stickers!
- Step 1: open the application on your cell phone and access a conversation, either in a group or an individual conversation;
- Step 2: tap on the emoji icon in the bottom left-hand corner of the keyboard. Then select the Stickers icon;
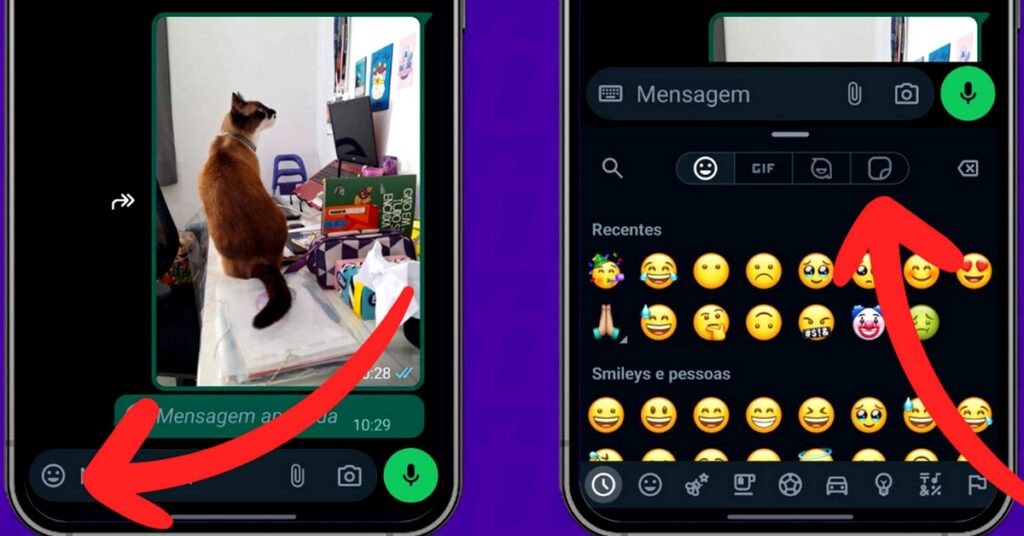
- Step 3: select the "create" option, represented by the pencil icon in the left-hand corner of the keyboard. This will bring up the options for making stickers on WhatsApp;
- Step 4: select the photo you want from your phone's gallery to make stickers on WhatsApp;
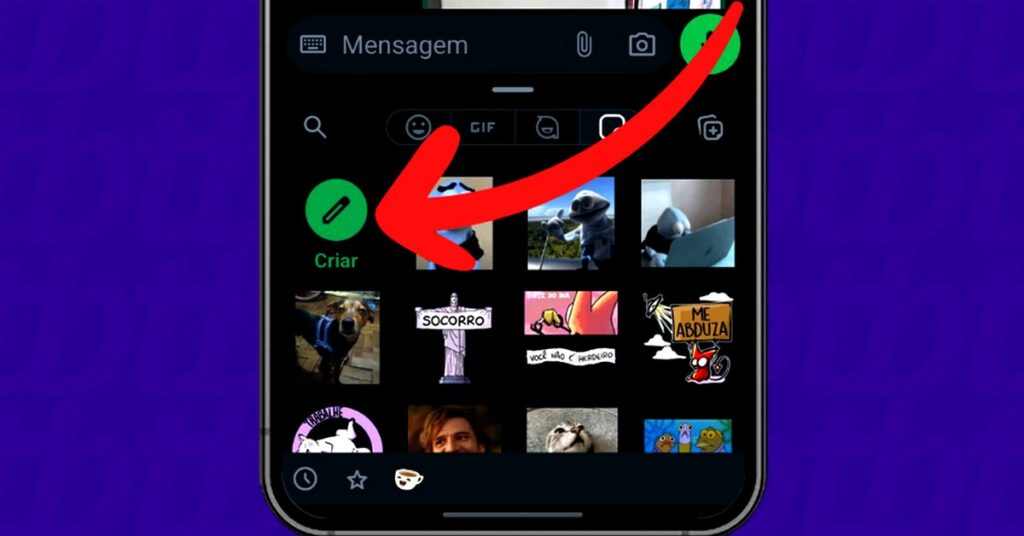
- Step 5: Now it's time to edit your new sticker. You'll see options to cut it out, add text or draw on it. Use your creativity and have fun creating a unique sticker!
- Step 6: To finish the creation process, just click on the "Send" button in the bottom corner of the keyboard. That's it! Now you've finished making stickers on WhatsApp and can share them in conversations.
How to make stickers on WhatsApp on iPhone
Making WhatsApp stickers on an iPhone is just as easy. If you have an iOS phone, you should know that it has a native tool that is available from iOS 17 onwards. Follow the instructions below and create your own stickers!
- Step 1: You'll need to open a conversation in your WhatsApp application;
- Step 2: select the Stickers icon in the bottom right-hand corner of the screen and the stickers area will open;
- Step 3: press the "+" button in the left-hand corner of the keyboard to open the space for making stickers in WhatsApp on iOS;
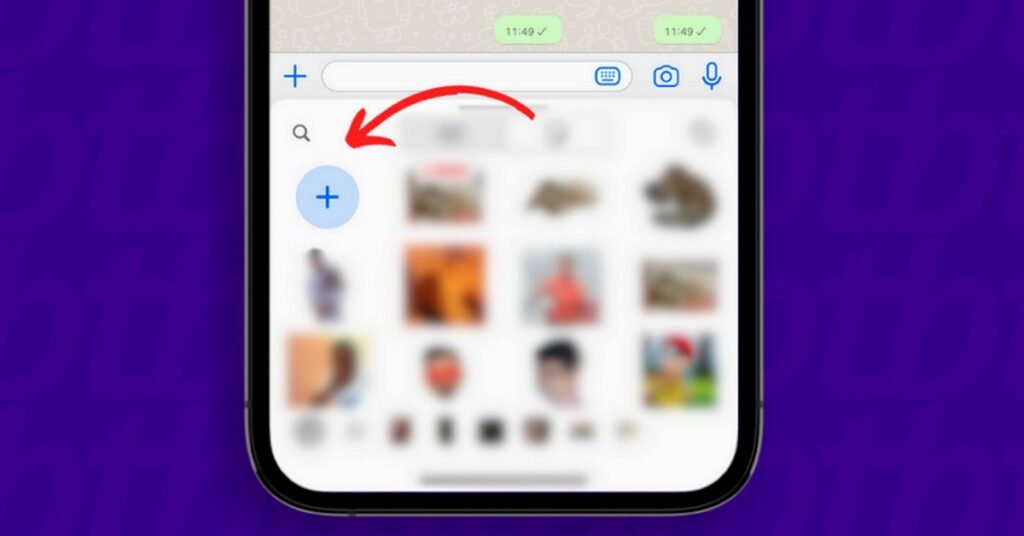
- Step 4: choose the image you want to use to create your sticker from the gallery;
- Step 5: Edit your new sticker. At the bottom of the screen, WhatsApp will provide options for cropping the image, editing, adding text, drawings and even emojis;
- Step 6: Once you've finished making the stickers on WhatsApp, click on the "send" button in the bottom right-hand corner of the screen and this will complete the creation of the sticker and it will be sent in the conversation;
How to make WhatsApp stickers on your PC
In addition to the possibility of making stickers on WhatsApp via Android and iOS phones, it's also possible to create them via PC using WhatsApp Web. To do this, simply open WhatsApp Web in your Windows or Mac browser and follow our instructions below:
- Step 1: open WhatsApp Web in your selected browser. If necessary, log in to your account;
- Step 2: open one of the conversations in your app, it can be a group conversation or an individual conversation;
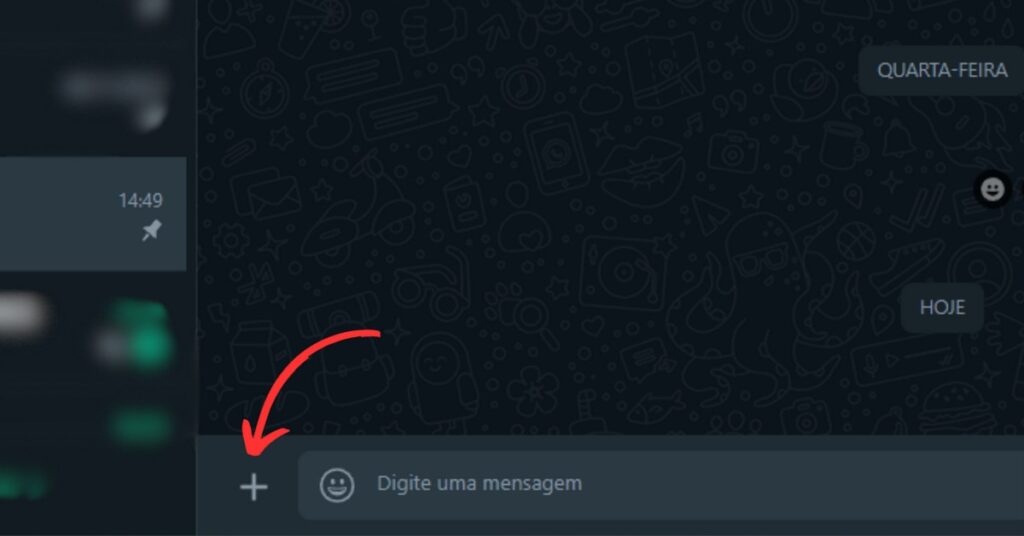
- Step 3: select the "+" button in the left-hand corner of the screen so that you can see more Meta options;
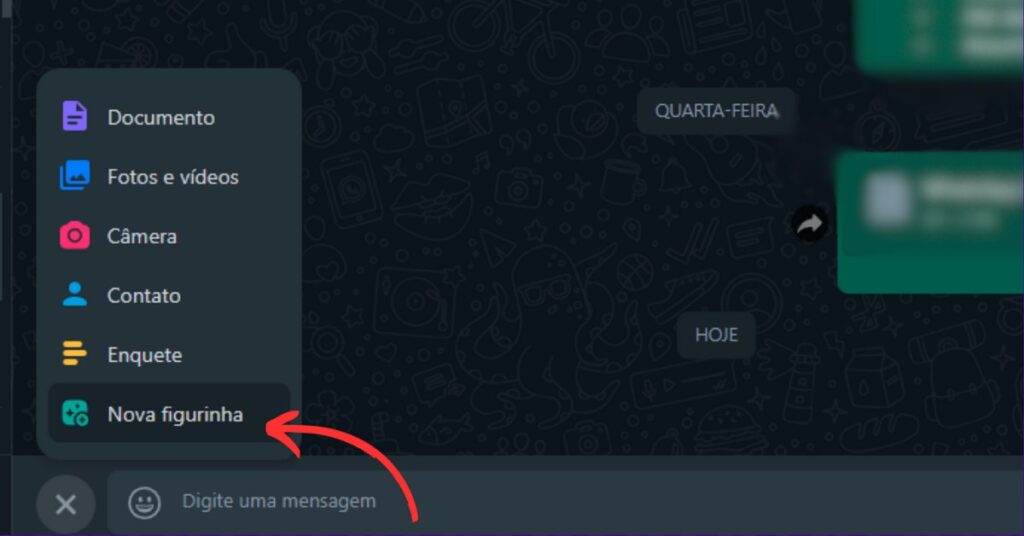
- Step 4: select the "new sticker" option, so you have access to photos saved on your computer to create stickers;
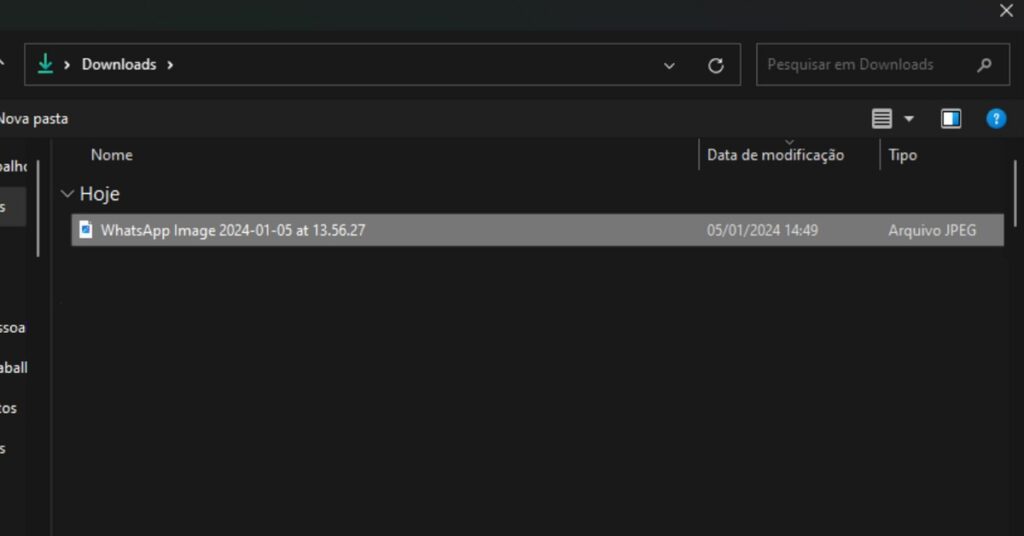
- Step 5: select the image you want on your PC and click on the "open" option to start creating stickers on WhatsApp Web;
- Step 6: Edit your sticker. In the top corner of the screen you'll find tools for editing and making stickers on WhatsApp, with the possibility of cropping the image, removing the background, adding text, drawings and emojis;
- Step 7: To finish and save your sticker, just click on the "send" button and share it in the Whatsapp Web conversation. That's it, you've made stickers on WhatsApp!
How to make stickers on WhatsApp with the Sticker.ly app
Even if you have this tool in the app itself, did you know that you can create stickers on WhatsApp using apps specifically for this purpose? One example is Sticker.ly, an exclusive app for creating WhatsApp stickers! Here's a step-by-step guide to using this external tool:
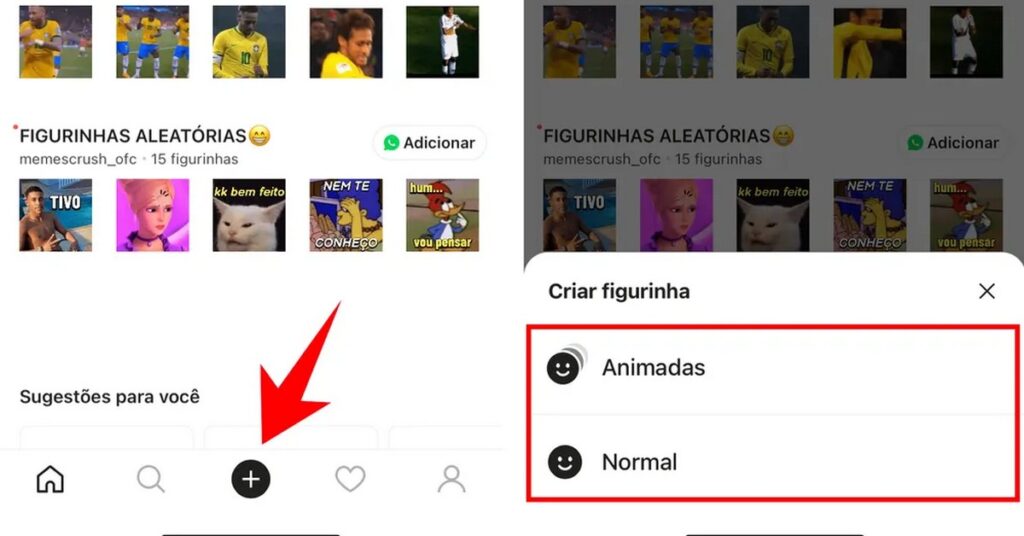
- Step 1: Download the Sticker.ly app on your Android or iOS device. Once downloaded, tap the "+" icon to start creating a new sticker. You'll also need to indicate whether the sticker will be static or animated;
- Step 2: select the photo you want directly from your phone's gallery;
- Step 3: the editing screen will open, just select the "manual" or "crop" option to choose which part of the image you want to use in the sticker.
- Step 4: It's time to edit and customize your sticker! Tap on "adjust" to remove or add what you want to the image. You can add text, phrases and select the font and colors you want.
- Step 5: If you want to add or remove a background to your sticker, select the "background" option and add the one you want directly from your gallery;
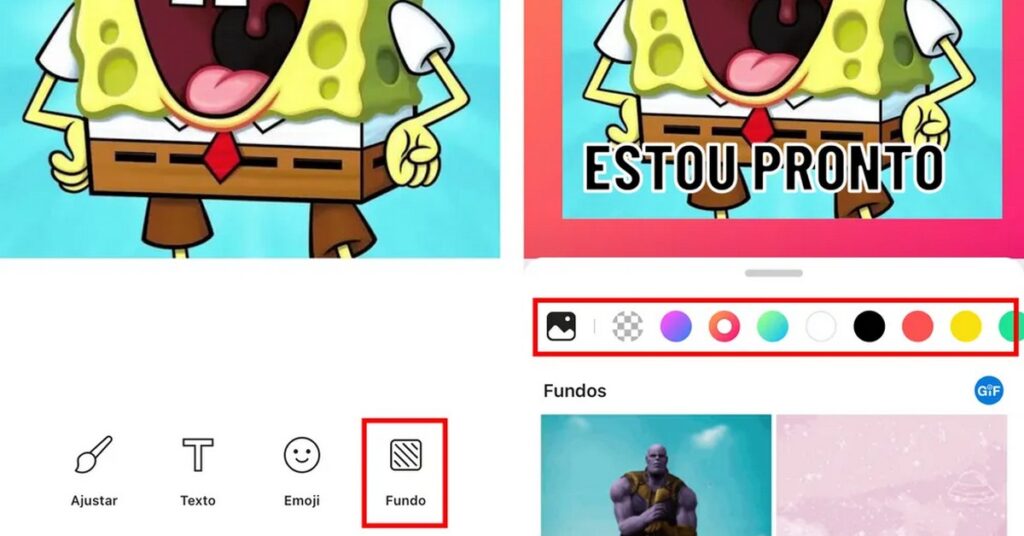
- Step 8: You can also categorize your stickers by entering tags for them, if you wish. Once you have completed this step, press "save";
- Step 9: go to the "new pack" option to create an album for your stickers. Type in the name you want to give the pack and select the "create" button;
- Step 10: Log in to Sticker.ly with your Facebook, Apple or Google credentials;
- Step 11: as soon as you log in, the pack you created will appear on the screen and you can add new stickers if you wish;
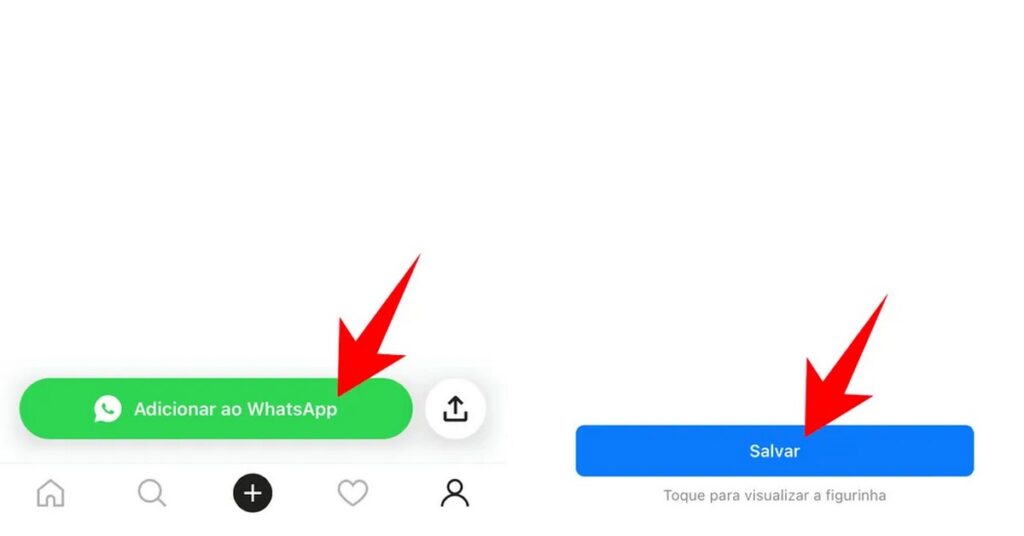
- Step 12: With the stickers created and ready, you can "add to WhatsApp" by clicking on the "save" button.
- Step 13: you're done! Open a conversation and send the sticker to as many friends as you want!
Making stickers on WhatsApp is a super easy task and doesn't require advanced knowledge, but with this complete guide we've provided above, using your creativity just got easier! There are these ways to create stickers and have fun exchanging messages between friends and family!
If you like tips on technology and apps, like the ones we've brought you today, be sure to check out our other content on how to mirror notebook on TV: complete guide and the 7 best apps for reading books!
Frequently Asked Questions
What's the easiest way to turn photos into stickers for WhatsApp?
As we saw above, the simplest and easiest way to make stickers on WhatsApp is through the chat app itself. It already has its own tools for creating stickers and you can do this more directly, whether on Android or iOS, just by following our explanatory guide above.
How do I delete WhatsApp stickers?
Deleting stickers from WhatsApp is possible, just follow these steps:
- Step 1: Open WhatsApp and enter one of your conversations;
- Step 2: click on the stickers icon;
- Step 3: select the sticker you want to delete;
- Step 4: press your finger on the sticker;
- Step 5: select the "Remove from Favorites" option to delete the desired sticker permanently;
